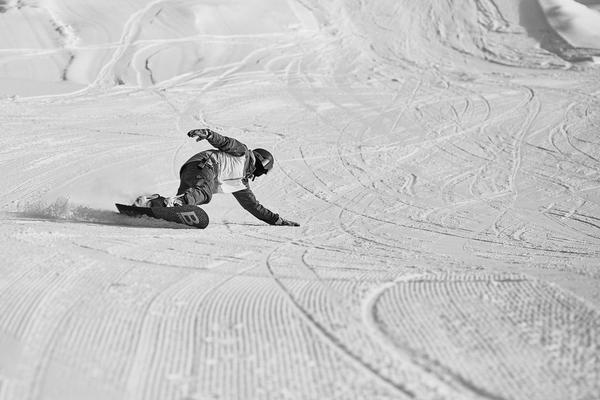
When a snowboard starts sliding faster than expected, instinct says to lean back or twist your shoulders. Usually, that makes the board harder to manage. Better snowboard edge control starts with smaller movements: staying balanced over your feet, adjusting the board’s tilt deliberately, and letting the edge guide your direction.
You do not need a steep run to improve. A wide beginner slope with a gentle pitch is ideal for practicing stops, controlled slides, and transitions between turns. These snowboard edge drills build on one another, so spend time on each before increasing speed.
Understand What Each Edge Is Doing
Your snowboard has a heel side edge behind your heels and a toe side edge in front of your toes. Tilting the board brings one metal edge into contact with the snow. That edge helps you grip, steer, or brake, depending on your speed, angle, and direction of travel.
Think of edging as a dial, not a switch. Less tilt allows more slipping; an appropriately engaged edge helps the board grip as you steer across the slope. The goal is progressive pressure rather than stamping on the snow. Comfortable snowboard stance setup matters too: boots and bindings should let your ankles and knees move freely.
Choose a Safe Practice Area First
Find an open, uncrowded learning slope with a gentle gradient and flat runout. Wear a properly fitted helmet, check uphill traffic before moving, and follow resort rules. Avoid icy patches, blind rolls, and busy trails. Practice slowly enough to reset between attempts. If you cannot stop reliably on both edges, consider a lesson with a qualified instructor.
Seven Snowboard Edge Drills for Better Turns
1. Stationary Edge-Rocking for Balance
On level snow with both feet strapped in, bend your knees slightly and relax your chest. Shift gently toward your heels to feel pressure against the binding highbacks, then return to center. Next, move your knees and shins toward your toes while keeping your heels inside the boots. These snowboard balance drills teach you to tilt the board while remaining centered.
2. Controlled Side Slipping on Each Edge
Position your board across a gentle slope. Facing downhill on your heel edge, use enough tilt to remain stopped. Gradually reduce the edge angle until the board slips straight downhill. Increase the angle smoothly to slow and stop. Repeat several short slides, then practice on your toe side edge while facing uphill.
Keep knees flexed, eyes up, and pressure centered between both feet. Aim for a gradual stop within a space you chose. If the board accelerates unexpectedly, return to easier terrain rather than forcing a sharp brake.
3. Falling Leaf for Direction Control
Hold your heel edge across the slope, shift a little pressure toward one foot, and let the board travel diagonally. Return to even pressure to slow, then encourage it to travel in the opposite direction without changing edges. When comfortable, repeat on your toe edge. Use subtle leg movements instead of throwing your shoulders around. Falling leaf makes small pressure changes easy to see in your track.
4. Traverses with a Planned Stop
Start across the hill on your uphill edge. Guide a little pressure toward the front foot to begin a slow traverse. Keep enough edge angle to avoid catching your downhill edge. Choose a visible stopping point, return pressure toward center, and guide the board farther across the slope to reduce speed.
Repeat in both directions. The goal is not to travel across the whole trail, but to discover how much edge engagement keeps the board steady, then brings it to a controlled stop.
5. Garlands for Turn Initiation
From a shallow traverse, release a little edge pressure and let the nose point slightly downhill. Before making a complete turn, re-engage the same edge and guide the board back across the slope. Your track will form gentle arcs like a garland. Make several arcs on your heel edge, then your toe edge, keeping downhill travel brief on beginner terrain.
6. J-Turns to Connect Steering and Stopping
Choose a gentle pitch with a clear runout. Begin with a short, slow glide, place slightly more guiding pressure through your front foot, and roll gradually onto one edge. Let the board turn across the hill and, if space allows, a little uphill until it stops. The track should resemble the letter J.
Practice heel-side and toe-side J-turns separately. Look where you want to go, not down at your feet. If you swing the rear leg to force the turn, slow down and focus on smooth edge engagement. Revisit how to stop on a snowboard whenever your stopping distance feels unpredictable.
7. Linked Turns Without Rushing the Edge Change
Link turns after you can finish J-turns on both edges. As one turn finishes across the slope, soften the old edge, steer toward the fall line, and move smoothly onto the new edge as the next turn develops. Keep your upper body calm and guide the movement through your legs.
Try making three wide turns of similar size. Control speed by finishing each turn farther across the slope instead of aiming downhill. The goal is rhythm, not aggressive carving. Reviewing beginner snowboard turning techniques can help if the sequence still feels rushed.
Why an Edge Catches or Washes Out
A sudden edge catch often happens when the downhill edge engages while the board is still moving sideways, or when you change edges too abruptly. Return to side slipping and practice releasing pressure gradually. A washing-out edge may result from poor balance, insufficient grip, or an edge angle that does not suit the snow.
Build a Repeatable Practice Routine
Begin with stationary rocking and short side slips on both edges. Follow with falling leaf and traverses, then pick either garlands or J-turns for focused practice. Finish with a few slow linked turns only if your earlier stops felt controlled. After each run, ask one useful question: Did I flatten the board too quickly, look at my feet, or finish the turn too early?
Frequently Asked Questions
How can beginners improve snowboard edge control?
Start on mellow terrain with heel-side and toe-side side slips. Practice gradual stops, then move to falling leaf, traverses, J-turns, and linked turns. Consistent balance matters more than speed.
Why is my toe-side edge harder than my heel-side edge?
Facing uphill can feel unfamiliar, and directing pressure through shins and ankles takes practice. Keep your knees flexed, remain centered, and try short toe-side slips before longer turns.
Should I lean back to slow down?
No. Leaning toward the tail often makes the nose harder to steer. Stay balanced over the board and manage speed by turning across the slope and adjusting your edge angle.
How long should I practice edge drills?
Short, focused sets work well. Move on when you can repeat a maneuver with balance and a predictable stop. Return to easier drills when fatigue, terrain, or snow conditions change.
Make Control the Goal, Not Speed
Confident turns come from trusting both edges. Work through these drills at a comfortable pace, especially on the side that feels less natural. As stopping, slipping, and steering become predictable, linking turns begins to feel like a continuation of the same skills.